12/14/10

Experiments in Food Preservation: Wild Grape Jelly

Wild Grapes

If you regularly keep up with this blog, then you might recall my post some months back about our trip to the Smoky Mountains. On the way back through Missouri, we stopped in the Eleven Point District of Mark Twain National Forest, spending a night at McCormack Lake and a few hours hiking the Irish Wilderness. Hiking around the lake, we came across numerous persimmon trees, whose fruit was not quite ripe, and discovered a bevy of wild grape vines. We discovered more wild grapes while in the Irish Wilderness, where we decided to grab some plastic bags and forage enough to bring home, leaving plenty for the birds and animals to eat.

There are several species of wild grape native to Missouri, though vitis riparia and vulpina are the ones most familiar to wild foragers in the region. There is another species, most commonly seen on river banks, called vitis rupestris, recognizable for its red stems. They're all quite common in the right location and, as far as I know, edible to humans (though usually quite sour and not as juicy as the commonly cultivated Mars or Concord). For the last couple of years, I have been gathering a few of the wild grapes growing as "weeds" in my yard and am slowly attempting to cultivate the vines for food.

Now, personally, I've never been a big fan of grape jelly. Compared to strawberry jam or orange marmalade, I've always found the stuff just sugary and bland, and I've never been fond of peanut butter & jelly sandwiches either. I love fresh grapes, though, and usually buy a few bunches of the Mars variety when I see them at market. This year I decided to experiment with low sugar grape jelly, just to see if I could.

Wild Grape Jelly

The process of making grape jelly is pretty much the same as with any cultivated grape, like a Mars or Concord (both of which are native cultivars derived from vitis labrusca). Following the Pomona recipe, I started with a pound and a half of grapes, which I then mashed and simmered for ten minutes, cooled and poured into a cheesecloth bag to drip for about one day. Since I was using the wild grapes, I added a bit more sugar than I would have done with a sweeter cultivated grape. Final tasting proved that the finished jelly was just as sweet as my previous batch of Mars grape jelly.

Wild Grape Jelly

1 1/2 lb wild grapes (vitis riparia or vulpina)
2 tb lemon or lime juice
1/2 cup - 1 cup sugar or 1/4 cup - 1/2 cup honey
2 tsp calcium water (included in box of Pomona pectin)
2 tsp Pomona Universal Pectin

1. Remove stems and mash grapes and mix with 1/4 cup of water in saucepan. Bring to boil and simmer for 10 minutes. Pour cooked fruit into jelly bag. Let drip until juice stops.

2. Pour juice into saucepan, leaving sediment undisturbed. Mix with lemon juice and calcium water. In a separate bowl mix together sugar or honey and pectin.

3. Heat juice mixture to boiling and add pectin/sugar mixture. Stir vigorously 1-2 minute to dissolve pectin, then bring mixture back to a boil and remove from heat.

4. Fill jars to 1/4" from top and seal. Store in fridge up to 1 month or process for 10 minutes in boiling-water bath.

With Christmas coming up, I'll be giving at least a couple of jars of this jelly to family and friends as gifts. Usually I print out nice labels for the jars, listing the date canned and ingredients, then top off the jars with a pretty holiday-themed circle of fabric, a ribbon, and gift tag. Just about everyone appreciates a homemade gift, especially one with a story attached. Imagine the joy or pride in telling someone their preserves came from the Ozarks or straight from your garden.

11/23/10

Experiments in Food Preservation, Part 2: Raspberry-Jalapeno Jam

Raspberry-Jalapeno Jam

This autumn the weather has been fairly mild, meaning that a number of harvests have held out longer than usual for Kansas City. I only just pulled up my jalapeno bushes last week, and they showed no obvious signs of being finished for the season. While chili peppers are typically at their peak in August, I got my most spectacular harvests in September and October and was stuck with about 2 pounds worth of the little buggers. Normally I like to make a few batches of salsa, but this year's harvest of tomatoes wasn't that great and October isn't exactly the tomato peak at market. Another great preservation technique for chili peppers is pickling, which I find just as flavorful and useful for salsas and other Mexican dishes (even Asian, if you're so inclined). But there's only so many jars of pickled peppers you can eat in a year and only so many you can give as gifts. Eventually it's time to try new things.

This year I decided to experiment with jalapeno jelly. Last year I followed a recipe from Preserving the Harvest, which I found far too sweet when paired with the usual cream cheese. I was hoping for something more like the perfectly balanced mango-jalapeno jam I bought a couple of years ago at the City Market. Walking through the garden one day and plucking some ripe raspberries from the vine, I glanced back at the jalapeno bushes and thought of that blend of sweet and spicy and wondered if maybe this combination was worth a try. And thus, I came up with the following recipe:

Raspberry-Jalapeno Jam

1/3 cup chopped jalapenos
1/3 cup white vinegar or apple cider vinegar
1/3 cup mashed raspberries
1 teaspoon calcium water (included in box of Pomona pectin)
1/4 cup sugar or honey
1/2 teaspoon Pomona Universal Pectin

1. Mix jalapenos and vinegar in saucepan. Bring to a boil; cover and simmer for 5 minutes.

2. Stir in mashed raspberries and calcium water. In a separate bowl, stir together sugar/honey and pectin.

3. Heat vinegar mixture to boiling and add pectin/sugar mixture. Stir vigorously 1-2 minute to dissolve pectin, then bring mixture back to a boil and remove from heat.

4. Fill jars to 1/4" from top and seal. Store in fridge up to 1 month or process for 10 minutes in boiling-water bath.

My original sketch of the recipe included a homemade raspberry red wine vinegar (far better than the abortive attempt at raspberry-vanilla vodka), but I found the results a tad heavy on the raspberry. In the future I'd use a more neutral white or cider vinegar, and I've made the change to the recipe. I'm also curious whether using the jalapeno-infused vinegar is really necessary, or whether simply cooking the jam is enough to draw out the spiciness. Thoughts?

Overall, I'm pretty happy with the results of this experiment and will likely continue tweaking this recipe next year. It's quite tasty spread on wheat crackers with some cream cheese and would probably be equally good mixed with a goat cheese spread.

11/11/10

Experiments in Food Preservation, Part One: Watermelon Jelly

Watermelon Jelly

I know it's November and nearly the end of the harvest season, but I've been meaning to post about this year's experiments with preserves and figured now was as good a time as any. Ever since I started preserving my own jams several years ago, I've been looking for some kind of base recipe to play with. The one book I own on the subject, Carol Costenbader's well-known Big Book of Preserving the Harvest, isn't very helpful in this regard, and the author warns against any changes made to a recipe. Much of the reason for this is that sugar helps to preserve the food, so any decrease in amount or changes in produce can throw off the balance within a recipe. Last year, after some frustration with my preserve-making skills, I discovered Pomona Universal Pectin, which is a wonderful dry pectin that allows you to make low-sugar, honey, or what I call "fake sugar" preserves. Better yet, they provide a recipe sheet that includes instructions for developing your own recipes for preserves. I've been using the stuff for over a year now and can't say enough nice things.

This summer I came into the possession of many watermelons and cantaloupes via my mother's garden. Much as I love melons, I find it really hard to use them before they go bad, so I looked into preservation methods. Because all melons have a high water content, it's difficult to do much with them. But they can be cut up and frozen for later use in sorbet or granita, or you can freeze the pressed juice or puree. A less common method of preserving melons is to turn them into jellies. Though it truly sounds odd, I was intrigued enough by the possibilities to give it a try. Much like grape, or anything other sort of jelly, you start out with juice. To make watermelon juice, you just cut up the flesh and press it through a sieve. The folks at Fair Share Farm posted simple directions for watermelon juice back in August. Yum. Once you've got the juice and the Pomona pectin, the rest is pretty easy.

Below is the recipe I came up with, based on Ponoma's recommendations. This makes a small 1-cup batch, roughly enough for a half-pint jar. I've adjusted the amount of pectin, since the batch I made turned out a bit too thick.

Watermelon Jelly

1 cup watermelon juice
1 tablespoon lemon juice
1 teaspoon calcium water (included in box of Pomona pectin)
1/4 cup sugar or honey
1/2 teaspoon Pomona Universal Pectin

1. Stir together watermelon juice, lemon juice, and calcium water in saucepan. In a separate bowl, stir together sugar/honey and pectin.

2. Heat juice to boiling and add pectin/sugar mixture. Stir vigorously 1-2 minute to dissolve pectin, then bring mixture back to a boil and remove from heat.

3. Fill jars to 1/4" from top and seal. Store in fridge up to 1 month or process for 10 minutes in boiling-water bath.

So now you're probably wondering how it tasted. Well, to be totally honest, it tastes a bit weird. I tried it with some buttered Farm to Market French Farm bread, and it wasn't bad. My significant other tried some on a peanut sandwich with less success. But give it a try next summer during melon season and see what you think. Maybe you'll love it.

P.S. Once you're done with your watermelon flesh, consider pickling the rind for a sweet winter treat!

9/28/10

Cheekwood Gardens and The Great Smoky Mountains

So...I haven't kept up with this blog as planned. But part of the reason is that we (my significant other and I) were on vacation for over a week, which involved lots of planning the week before and the requisite decompression thereafter. We drove from Kansas City to the Great Smoky Mountains National Park and back, with stops in St. Louis, Nashville, Memphis, and The Ozarks along the way. It was a great trip filled with the requisite tourist stops and some beautiful natural scenery. I definitely came away with a fondness for Tennessee as a state, at least in terms of aesthetic appeal.

While in Nashville, we spent a couple of hours at Cheekwood Botanical Gardens and Museum of Art, formerly the residence of the wealthy Cheek family, who made their fortune off Maxwell House coffee. It's quite large, with different themed gardens throughout the space, including a color garden and Japanese style garden. My favorite of the gardens we walked through was probably the color garden near the main entrance. The space was full of striking combinations that took full advantage of the dry, full-sun location:

Color Garden 2

What I like about the above photo is the combination of the cool dusty miller and perennial salvia with the deep, bright reds. There were also complimentary combos of bright lime green with a wine red, in addition to contrasting textures. It was a great example of contemporary styles of garden design that place emphasis on large naturalistic swaths of color and texture. I don't have the space for these kinds of mass plantings, but it was definitely inspiring.

Right now, Cheekwood having an exhibition of glass works by Chihuly throughout the gardens and inside the museum. As an artist, I'm not a big fan of Chihuly. Once you've seen a couple of his pieces, you pretty much get the idea. There's also controversy surrounding the fact that he doesn't blow his own glass or build the larger structures most are familiar with. Nonetheless, it was interesting to see how the vegetal/floral glass sculptures were integrating into the garden, contrasting or complimenting the shapes and colors. Some of the most interesting pieces were the floating "globe onions" in the reflecting pools near the Japanese gardens:

Globe Onion 1

The Great Smoky Mountains were a rather different experience, a mostly untouched natural world instead of the cultivated world of Cheekwood. Parts of the park contain old growth forest, a rarity in much of the United States (if the world). The variety of plant life we saw throughout would definitely inspire any observant gardener. Despite it being the last yawn of summer, we saw plenty of wildflowers, many of which are familiar in gardens. For instance, there were quite a few cardinal flowers growing wherever they could find a scrap of sunlight:

Cardinal Flower

I was especially excited by the Joe Pye Weed in its natural setting:

Joe Pye Weed

I've loved these flowers for a long time and have more recently considered planting some in a spot of the yard prone to flooding. I'm not sure which species these were, but they were quite numerous along the banks of Noland Creek. If you look carefully in the background, you can see the rhododendron bushes that were incredibly common throughout the park. I can only imagine how gorgeous the forest is when these things are in full bloom. The tropical-looking leathery leaves add plenty of interest on their own. They'd make a wonderful addition to a shade of forest garden.

Of course, that's just a portion of how we spent our vacation. I might post some of the photos I took during our visit to Mark Twain National Forest once I have them uploaded. Now that we're back in town and summer has settled down, there will be more posts, I promise. Hope everyone reading had a great and relaxing season!

8/19/10

Pickling Hot Peppers

Jalapeno

This is my second year participating in a CSA and I'm still enjoying the weekly batch of produce I pick up each week at Badseed Market direct from the farm. Last year I didn't really take advantage of the bulk list, which would have provided more opportunity for preserving food over the winter, but this year I've ordered a few bags and already have much fuller cabinet. Our last order included basil for pesto, pepperoncini peppers, a pound of tomatilloes for salsa verde, and a bunch of jalapenos. If you've been keeping up with my garden blog for a while, then you'll remember last year how I extolled the virtues of pesto; there's already a fat bag sitting in the freezer, waiting for the frost to hit. That particular entry also extols the virtues of salsa, canned and fresh.

Of course, one can throw only so many jalapenos into salsa before it becomes barely edible, and after you're used up all the tomatoes or tomatilloes, it's time to find something else to do with the little buggers. Probably my favorite way to preserve peppers is to pickle them. Pickled jalapenos are a good replacement in any recipe that calls for fresh, and they're an awesome topping on nachos and fall chili. The recipe I use from Andrea Chesman's Serving Up the Harvest is very basic; you don't need much to augment the flavor of chiles, just a bit of salt, sugar, some garlic, and some mustard seeds (I didn't have any mustard seeds in my cupboard, so I left them out). Process 10 minutes and viola!

While planning what to do with my jalapenos, I remembered a recipe I found online 2-3 years ago for a pickled condiment, not unlike a Mexican giardiniera, featuring hot peppers, garlic, onions, and carrots. It's called escabeche, and you can find the recipe online at Simply Recipes. The recipe requires a bit more labor compared with a basic hot pepper pickle, but as I recall, the flavor is richer and more nuanced. I'm sure this comes from the additional vegetables, spices, and frying everything in olive oil first.

Here's a photo of the two recipes after processing:

Pickled Jalapenos

Looks tasty, eh? All but a couple of those peppers came from the CSA, since my jalapenos have not been supremely productive this year. The carrots, however, came from my garden.

After I spent the day pickling hot peppers, I took the time to reorganize my cabinet, so the oldest items were in the front. It was already quite packed with the whole cucumbers I pickled in July and the strawberry jam I made back in May. I can't wait to see what everything tastes like in another few months when the flavors have had time to blend.

Garlic Pickles

My preserves stay inside an old Hoosier cabinet my mother bought as a birthday present last year:

Hoosier Cabinet

I'm very fond of the cabinet, since it provides me with an extra work surface and nice dark places to store preserves and potatoes.

Last weekend I picked a bunch of cucumbers from my mother's garden and am planning on making some relish before the weekend is through. Do you have any plans to pickle before the season begins to wane? Or will you be making that last batch of salsa or pesto instead? Do tell!

8/5/10

Long time, no post!

Though the garden has been quite busy this summer, I've been horrible neglectful of this blog. Has it really been over 2 months since my last post? My heads been full of various ideas for entries, but for whatever reason I've lacked the impetus to post. I want to change that. I'm going to start posting at least one entry per week and cover more issues pertaining to sustainability, local food, and urban homesteading. I'll also "redecorate" at some point and redo the layout of this blog, in addition to re-organizing/adding links. So expect lots more activity from now on!

To cover the time I've been away from this blog, here are some bits & bobs from late June and the month of July...

Lavender

In June the lavender bush bloomed, and I gathered the flowers to dry. I believe it's the 'Hidcote' cultivar, whichever variety is well adapted to wetter, temperate regions. I've had the plant since 2008, and the bush has gotten progressively larger since then, blooming profusely in the summer and showing off its grey-green foliage through the winter. I don't have proper drying equipment, but it's very easy to collect the flowers, tie them into bundles, and hang them around the house for a bit of perfume. The flowers in the photo were too short/small to bundle, so I let them dry on paper towels. When they were finished drying, I pulled off the flowers and stored the herbs in plastic bags.

Tomato Hornworm

Here is one of the hornworms I found on the tomatoes near the end of June, thrown into the grass for the robins to find. Usually, I don't have problems with these little guys, maybe one or two a year. This year, in the new vegetable garden, I found a whopping three hornworms. OK...not that many, but more than I'm accustomed to. Haven't seen a one since I took this photo. Cabbage worms are generally a bigger problem for me.

Bronze Fennel

Pretty bronze fennel flowers. My plants returned this year, and the one along the south side of the house is well over 6 feet tall. Amazing. I'm letting the flowers go to seed so I can get some use out of these plants. They don't bulb like Florence fennel does, and their stalks tend to be rough and stringy, so they're not ideal for cooking, but you can use the leaves as an herb/garnish, and the seeds taste just the same.

Squash and Cilantro

I just love this combination of textures: the large, broad leaves of the squash with the small, feathery leaves of the cilantro going to seed. I'm not sure if these are "correct" companions, but they seemed to do well together. Still waiting for the seeds to dry so I can have coriander. This is a 'Discus Bush Buttercup' winter squash and 'Caribe' cilantro.

Squash Leaf

Leaf from the 'Rond de Nice' summer squash, which is the closest to a proper bush variety I've found in this family. Actually, only today I figured out that this was the summer squash, not the 'Discus Bush Buttercup' I also planted (which forms less of a proper bush, more of a stocky vine).

Coneflower and Oregano

When July came, I decided to visit some plant sales and found quite a few good deals, including this coneflower and oregano plant. When I moved the vegetable garden this summer, I had to rearrange the flagstone path somewhat and pulled out the once-thriving oregano, which I inevitably waited too long to re-plant. The oregano died, so I bought a new plant for a mere $1. Hope it does better!

Purple Coneflower

Another shot of the coneflower, the ubiquitous 'Magnus' variety, of course. I like my echinicea pallida plants, but they have less immediate impact, and I thought some variety might be a good idea. I love coneflowers, though. Can never have too many.

Lilies 2

Lilies 1

The 'Stargazer' lilies in the front border, putting on their yearly show. I especially like the 2nd photo, because you can see the black seed pods from the baptisia, which is impressively big this year.

Lobelia

One of the lobelias I planted back in May. After I saw these on a camping trip last September, I had to have one. The flowers are on a tall spike and pretty small, but they look a bit more striking in groups. Given the right conditions, these are supposed to spread very reliably. They're native to this region, like wet conditions along river banks, but hold up well through droughts. I'm sure they'd be perfect for a rain garden.

Melon

A few weeks ago, we visited my mother and stepfather's house in California, MO and were impressed by how well her garden is doing this year. She planted 3 types of melons, which covered probably 20 square feet or more. They weren't yet ripe, so I just took pictures.

I've avoided growing melons myself, because they tend to put out very long vines and I've yet to find a shorter vined or bush cultivar. If any wayward readers can recommend that works in small spaces, I'd love to hear about it!

5/25/10

A Walk Through the Garden

Since the backbone of the new vegetable garden was completed, the last month in the garden has mostly been filled with busy work in between heavy bouts of spring rain. The last several days have been thankfully dry, leaving me plenty of time to wander around the garden. So I thought it might be nice to give a walk-through everything that's been going on.

Starting from the backyard, here's Molly busy with her usual chore, patiently waiting for squirrels:

Waiting for squirrels...

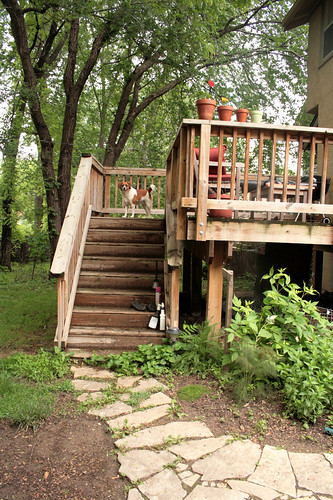
Of course, looking at this photo, I'm reminded of all the weeding that needs to be done on and around the path. The violets I let grow by the steps and now threatening to overtake the steps, and you might see the walnut seedling growing nearby. Maybe you can also see the yarrow, creeping thyme, raspberry, bronze fennel and mint? This bed is a bit formless, an afterthought compared to other beds, very much a work in progress.

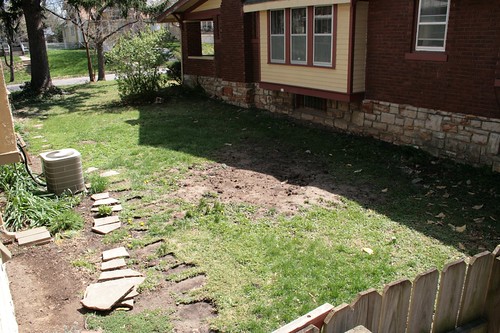
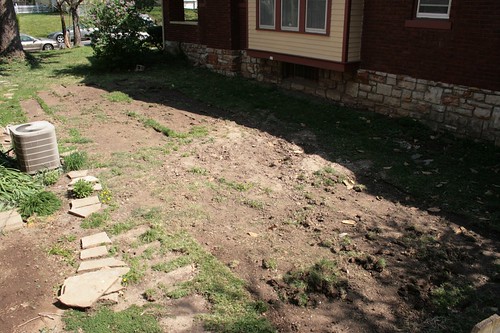
Turning to where the old vegetable garden used to be, you'll notice big changes:

Woodland Garden

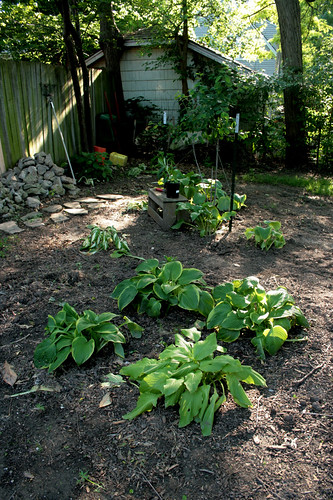
The beginnings of a woodland garden. Back in January, my mother and stepfather moved to a new house along a lake with plenty of garden, much of it filtered shade. Lots of hostas, more than she wanted. So when we were down a few weeks ago, she dug up a bunch and gave them to me. They're already serving as excellent filler, and there are plenty more to plant along the fence.

The focal point of the woodland garden is a serviceberry (sometimes called juneberry) tree purchased from Suburban Lawn & Garden:

Have a seat.

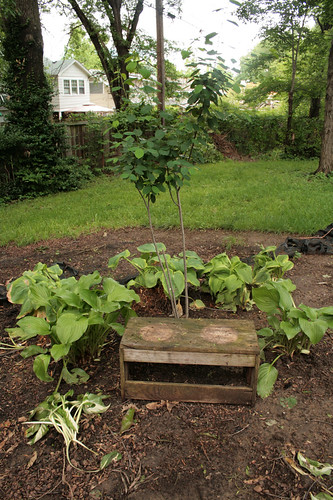
It's an understory tree that does well beneath the filtered shade of the redbuds and larger trees that surround our yard. In spring it produces a show of white flowers and produces small edible berries that attract birds. Apparently, the berries make good preserves, but much like crab apple, the fresh taste is too sour to be enjoyable. The tree should get about 20 feet high when fully mature, and we are attempting to stretch the trunks for a more open shape.

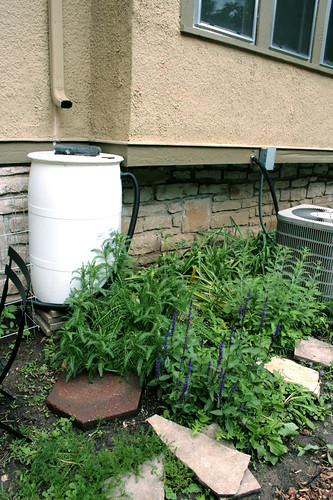
Turning back towards the patio, there's the new rain barrel we installed next to the gate:

Garden Gate

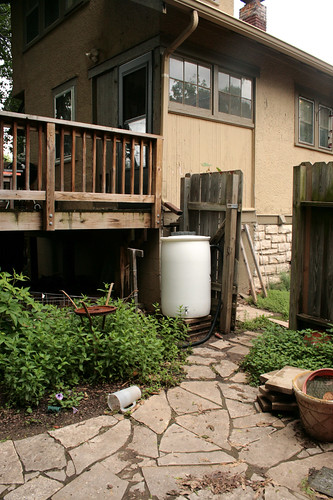
We might make further changes to the spot behind the gate, since we overshot the length on the downspout and the gutter is still prone to overflowing. Rather than struggle with the water, I'm considering building a little rain garden. This might also be a great spot for a native plant I really love called Joe-Pye weed.

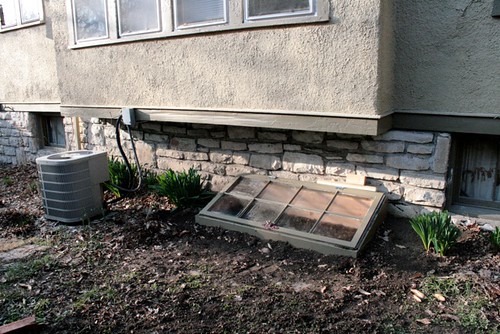
Walking through the gate, you can see the other rain barrel we installed on the south side:

South Herb Border

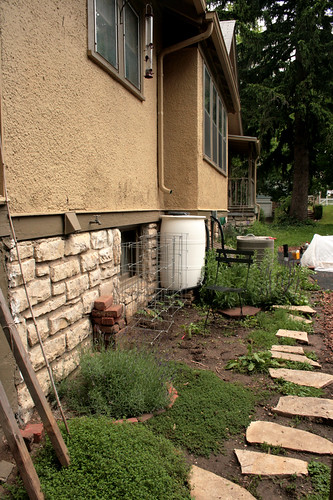
We got the rain barrels from a local non-profit called Bridging the Gap, which facilitates recycling and other environmental programs in the Kansas City area. They do workshops teaching folks how to build these things, but we decided to purchase a couple of pre-made barrels instead. At $65 a piece, they were a far better deal than anything from a catalog or online. Not so pretty, but I don't really care so much about that. With all the rain we've been having, I've already watered my plants from the barrels several times.

In this photo, you'll also notice my tomato cages and filled-out flower/herb border. The lavender and thyme plants have really taken off this year. Here's another photo taken a few steps down the path:

South Herb Border

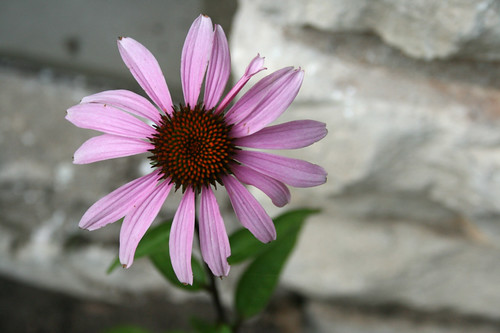
You can see how the yarrow, salvia, and perovskia are doing quite well. The pale coneflowers are a bit too slender and diminutive to be seen in the background, but I'm hoping that with some time they will spread. They get around 3-4 feet tall in summer.

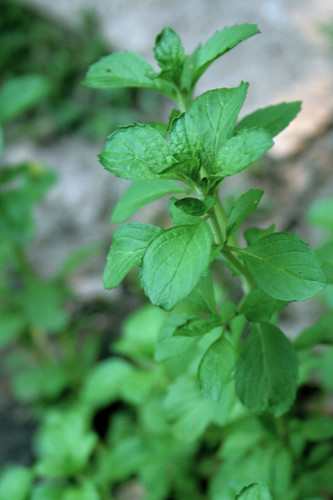
Along the path near the gate, you can still find some pennyroyal:

Pennyroyal 1

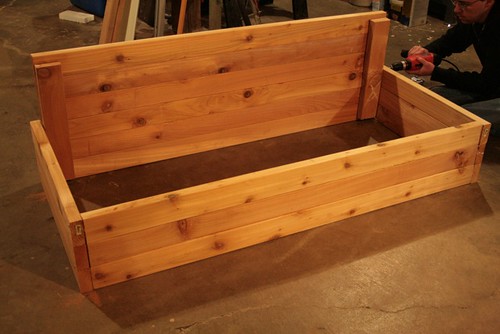
Beside the gate is my new bed for the raspberries:

Rapberries

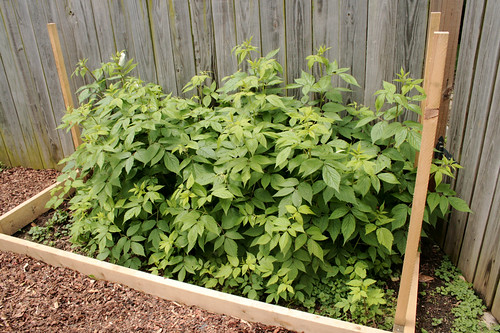
As mentioned previously, it's 'Caroline', ever/fall-bearing variety that produces big juicy red fruits from August to October. Soon I'll string some wire or twine along the posts and bring a bit of order to this bed. I'm waiting until fall/winter pruning before filling the box up with soil.

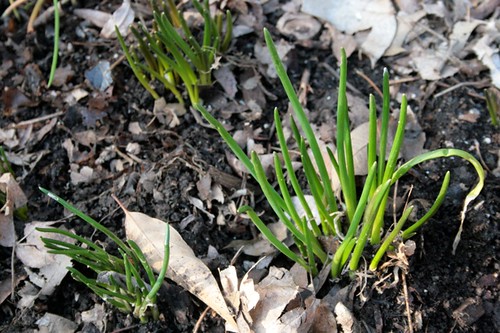
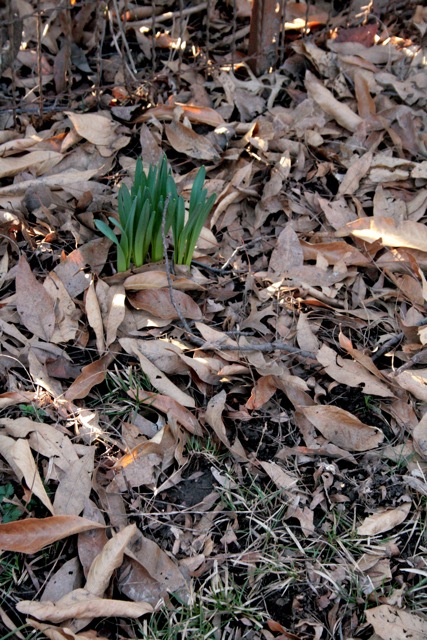
On to the vegetable beds! Look at the lovely little surprise I discovered a couple weeks back:

Volunteer Potato

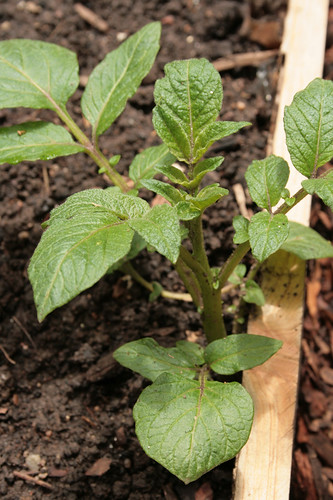
It's a volunteer potato in my hot pepper and basil bed. When we dug up the soil from the old boxes, I searched for any remaining potatoes and other bulbs and roots, but found nothing. So imagine my surprise when this little baby popped up. It's probably on of the 'Caribe' potatoes I grew last year. I'm going to let the vine grow and flower and see if it produces more of those violet-skinned beauties.

Elsewhere in the vegetable garden, a bush beans waits:

Bush Bean Seedlings

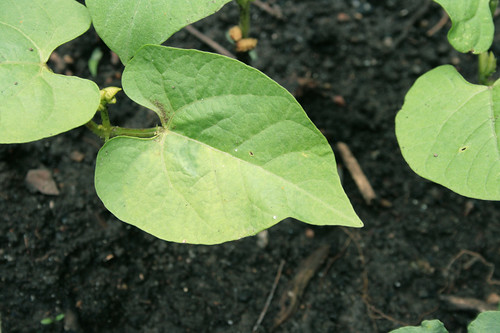
I've got two 2'x1.5' bush bean plot, but I failed to mark them after planting and am not sure which is the 'Gold Crop' and which is the 'Jade'. Guess I'll know when the pods start appearing this summer.

What else is growing in the vegetable garden? Well, we have some Swiss chard:

Swiss Chard Seedling

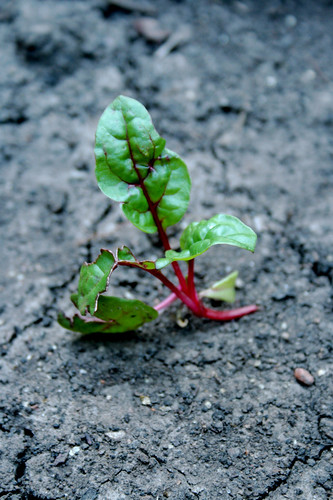
Typically, chard and spinach are started outdoors, but I started a few indoors, all of which died in the great cold frame debacle. The plants started outside have suffered a few insect attacks and are just now getting their 3rd and 4th leaves. I've had to cover the spinach and chard plots and do a bit of reseeding, but the chard is holding through admirably.

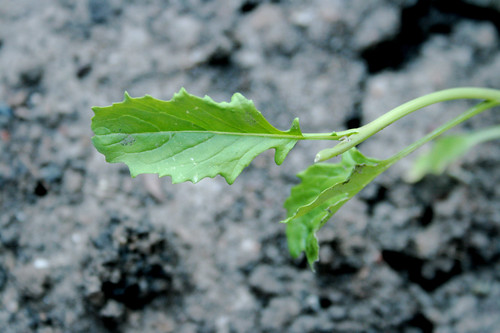
Despite similar insect attacks on the raab and cole crops, the plants have continued to persist:

Raab Seedling

Actually, I fashioned makeshift cloches to ward off further damage until the plants got large enough to hold their own:

Homemade Cloche

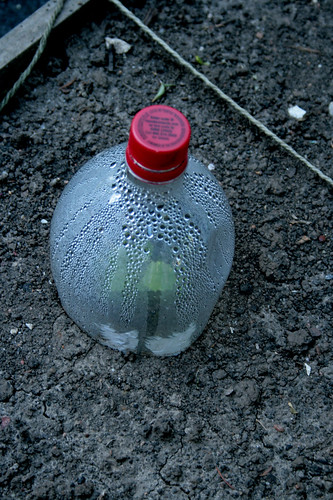
I'm sure you can tell that it's just the top of a soda bottle, the cap of which can be removed to let cooler air in. I've been saving these a few years for just such a purpose, and they work pretty well.

And here's a partial view of the vegetable garden from the east:

Vegetable Garden

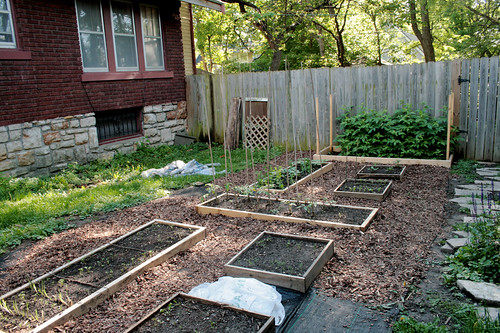
The mulch we bought ended up not being enough to cover all the paths, but at least we've got the landscape fabric to stifle the weeds. I also wish the beds looked more abundant than they do, but I'm hoping it looks more impressive by July.

Anyway, on to the front border I never seem to talk about anymore:

Front Border

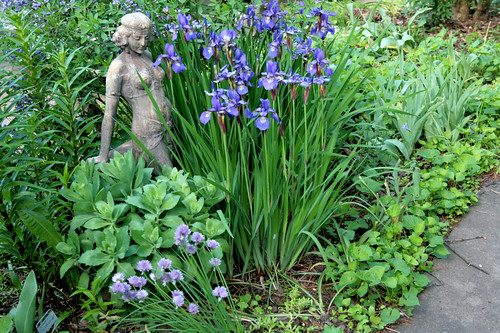
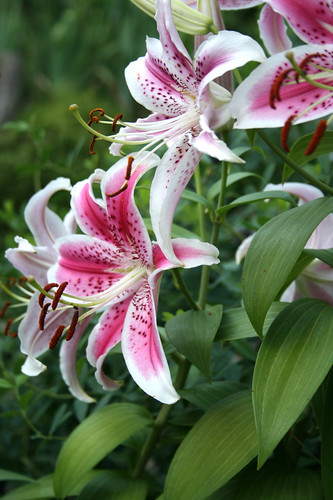
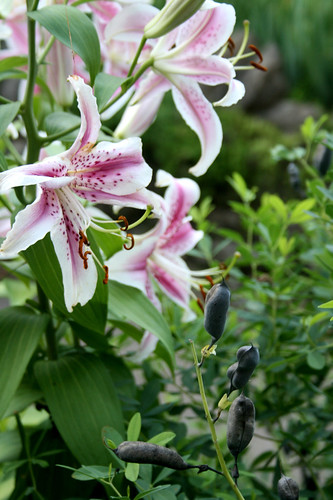
The Siberian irises look quite impressive, and the baptisia makes for a wonderful backdrop when in full bloom. The current plan is to remove the tall red-orange Asiatic lilies that clash with my relatively cool color scheme and give them a new home, perhaps elsewhere in the yard or with family. The 'Stargazer' Oriental lilies, which are a more pleasing fuchsia-streaked white, will go in that spot. Or perhaps that's where I'll put the lobelia syphilitica. I like how the reddish tones and white pop beside the blue and violet. The lobelia won't bloom until late summer and fall, at which time it'll be the main show.

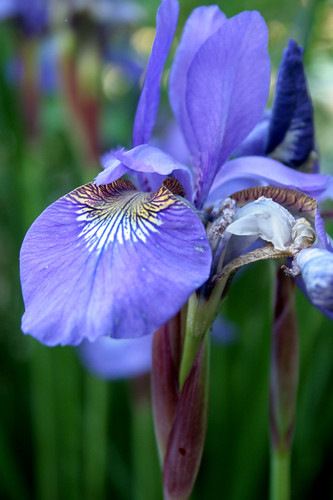
But those irises look lovely...

Siberian Irises 2

Don't they?

Siberian Iris

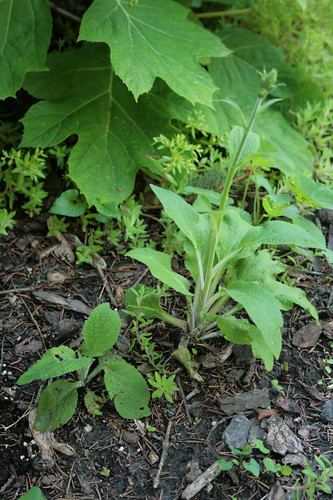
Elsewhere in the front garden are little surprises:

Volunteer Foxgloves

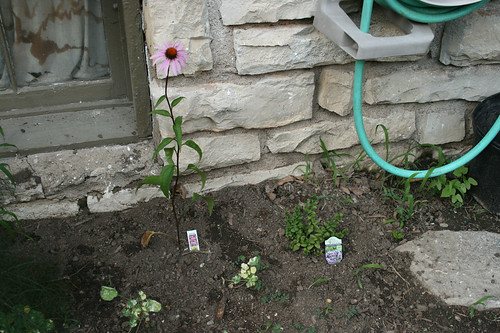
Finally, there's the rock garden I started last year in the northeast yard along the rock wall, a spot that is dry and gets a fair amount of sun during the day. The 'Ultra Violet' hybrid salvia (or desert sage) I planted last year is now in bloom:

Rock Garden

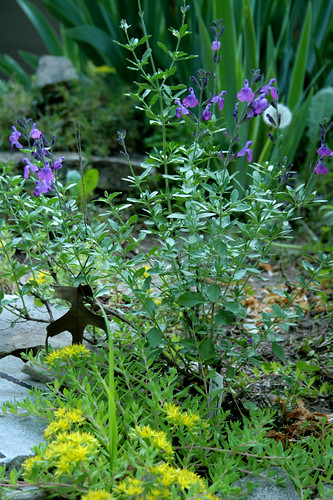
I think the yellow flower of the sedum makes a lovely contrast. Below that is one of the purple hens & chicks that I started with last year, along with a blue-green sedum I bought about a month ago:

Hens & Chicks

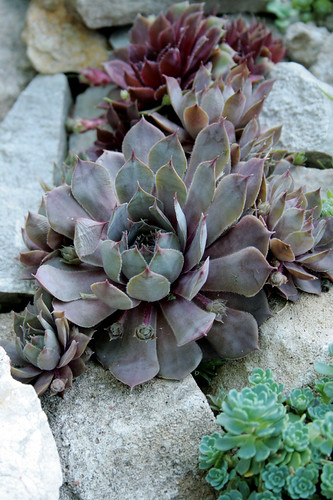
I'm still looking for more succulents and alpines to fill the space, but as with most of the plots in my yard, I've decided to take a slow-paced piecemeal approach to design. Wandering through my garden, I'm starting to really love how everything's taking shape and looking more like the space in my head.

4/19/10

Rebuilding a Garden

South Garden 3

Back in December, I discussed my plan to move the vegetable garden from the backyard to the space on the south side of our house. This spring we've been working hard to turn plans into reality, in spite of circumstances intervening and things going slower then planned.

In March, Rob dug up the forsythia, which ended up taking a couple of hours and a sledge hammer. The results left a nice little pit of dirt and at last no stump to contend with:

South Garden 1

After that was done, I pulled up the old beds we built back in 2007 and took a look at the boards. My assumption was that the bottom portions would have some decay but would be otherwise usable in the new plot, so I was a little surprised by the severity of the decay on some of the boards. Here's a photo to illustrate what I'm talking about:

Decayed Boards

The heaviest decay occurred on the boards further downhill, which is lightly shaded throughout much of the shade and obviously gets more water when it rains. It's also worth mentioning that we built the beds with 1"x8" untreated pine boards. After 3 seasons in-ground, some decay is to be expected. Less expected were the termites that infested 2 or 3 of the boards; our house suffered minor termite damage in the distant past, but we've never seen any sign of the critters. When I first discovered all this, I was afraid we wouldn't be able to reuse the boards at all, but after further assessing the damage, we were able to salvage half for use on the small 2'x2' and 2'x4' frames. Not bad!

For the rest of the boxes, we settled on untreated pine 2"x6" boards, which would give us a good bed height without having to double them up. Initially, I considered the more rot-resistant cedar, but it wasn't as cost-effective. In theory, the sunniness of the new spot and the thicker weight of the boards should help stave off decay longer than in the previous plot.

But before we actually built the frames, it was onto the new step, which was clearing out the grass. Originally I considered doing what a lot of raised bed gardeners do, which is starting right on top of the grass and blocking out weeds with cardboard, newspaper, or landscaping fabric. We'd lay some cardboard along the paths to kill the grass and eventually lay some pebbles or mulch. This idea wasn't really that great, though, since it would end up diverting more water down the path, which would pool up near the gate. Not cool. So we decided that removing an inch or two of sod would be a better idea.

Last weekend we rented a sod cutter and spent an hour or so ripping out lawn:

South Garden 2

A bit of a spotty job, but nothing a shovel can't fix.

The last step was building the frames and installing them, which takes more effort than you can imagine. It's hard to tell in photos, but the south yard slopes ever-so-slightly, necessitating the leveling of each bed. Once this task was finished, we broke up the remaining layer of soil (mostly clay), removed offending root masses, and brought in the wonderful soil from the original vegetable garden that took 3 years and a lot of compost to build. We ended up having lots left for the future woodland garden, the backbone of which we'll start building in another week or two.

While the renovated vegetable garden has gone brilliantly, I've had an awful time with seedlings and have lost most while in the cold frame. It does a terrific job trapping in heat during the hottest parts of the day but seems not quite able to block out the frost. 2 weeks ago we had a few nights when the temperatures dropped near freezing, effectively killing the bulk of my seedlings. It's also possible that I have not left the cover on long enough to generate the necessary heat. Whatever the issue, I'm going to try and work it out before autumn, so I'm able to extend my crop a bit longer than usual. I look forward to the challenge!

3/22/10

Happy Equinox!

Chives, March 2010

I took this photograph about a week ago, when the temperature hit a balmy 60 degrees and evidence of Spring's arrival was sprouting throughout the garden. Spring officially dropped by on Saturday, but you wouldn't know it from the weather. Snow fell from morning to night, and the temperature hovered in the 30s. I transplanted lots of spring bulbs the day before--daffodils, hyacinths, magic lilies, and Stars of Bethelehem. The cold spell was luckily too brief to kill them, and much of the snow melted today. Here in Missouri, Spring is always a precarious endeavor.

Daffodils, March 2010

3/16/10

How to Build a Cold Frame


The title is not completely accurate, i.e. this entry will not lay out detailed instructions on building your own cold frame. Instead, it's about how we (my significant other and I) finally built our own cold frame from an old window and some 2X4 cedar boards. For the uninitiated, a cold frame (or cucumber frame, as they say in some parts) is sort of like a miniature greenhouse with a basic frame and a hinged roof on top. What's the point of building a cold frame? Well, it's a good way of extending the season in your vegetable garden. You can start plants early inside the frame or keep plants inside after frost hits. You can also protect young seedlings from possible frost in the early spring.

As I mentioned in some entries last year, I've been planning on building a cold frame for a couple of years. Last spring I made a makeshift cold frame using one of my raised beds and a glass window, and it worked well enough for protecting seedlings at the time. I toyed with purchasing a frame, perhaps a high quality cedar box, or a cheaper plastic box, but since a lot of people makes their own using an old window and a wooden frame, things we had access to, it made more sense to go the handmade route. So I chose the biggest window in the basement (the previous tenants kindly left us plenty) and measured it. 61"x28". Plenty of room. I consulted a number of websites, including some videos on YouTube, on the construction. This particular demonstration was especially helpful:


We decided to go with cedar, since it resists decay better than pine, and I want my cold frame to be a more or less permanent structure within the garden. Most of the construction was done by Rob, who laminated and screwed the boards together to ensure sturdiness and keep out any drafts. The photo above should give you a clear enough sense of how he put it together. Very basic, nothing fancy. Once the box was finished, we painted the window and the box, using the same trim paint the previous owners had so graciously left behind. We attached the window with two hinges and used an old metal pull we found on a cabinet in the basement (more leftovers). While the paint was drying, I dug up almost a foot of dirt from the spot where I planned to place the frame, lined the square with bricks for the frame to stand on, and then added a layer of gravels and rocks for drainage.

And here's how the cold frame looked yesterday:

Cold Frame 2

While the cold frame is about 6 feet long, it looks pretty small in context of the landscape. The fact that it's buried about 6" in the ground helps too. It's going to be another week or two before I can tuck some seedlings inside, but I've already noticed the window collecting condensation and how warm the soil inside is compared to soil outside. I don't have a thermometer to test it, but I'd guess there's a 10 degree difference.

So that's how we built a cold frame. The task that had been persistently dogging me for over a year is officially finished, and I'm looking forward to another spring. Next, we'll be ripping out the grass along the south strip, tearing down and rebuilding our raised beds, and relocating the vegetable garden to make way for a woodland garden in the backyard. Perhaps we'll make headway on the grotto this summer? Stay tuned!